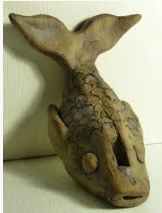
artwork by Rachel Buckle, 2012
Line Drawings
Click on the link below and read about the 8 different ways to use line in art; blind contour drawing, gesture drawing, continuous line drawing, contour drawing, cross contour drawing, planar analysis drawing, wire sculpture drawings, and hatching cross-hatching & line techniques. Create examples of 5 (your choice) of those 8.
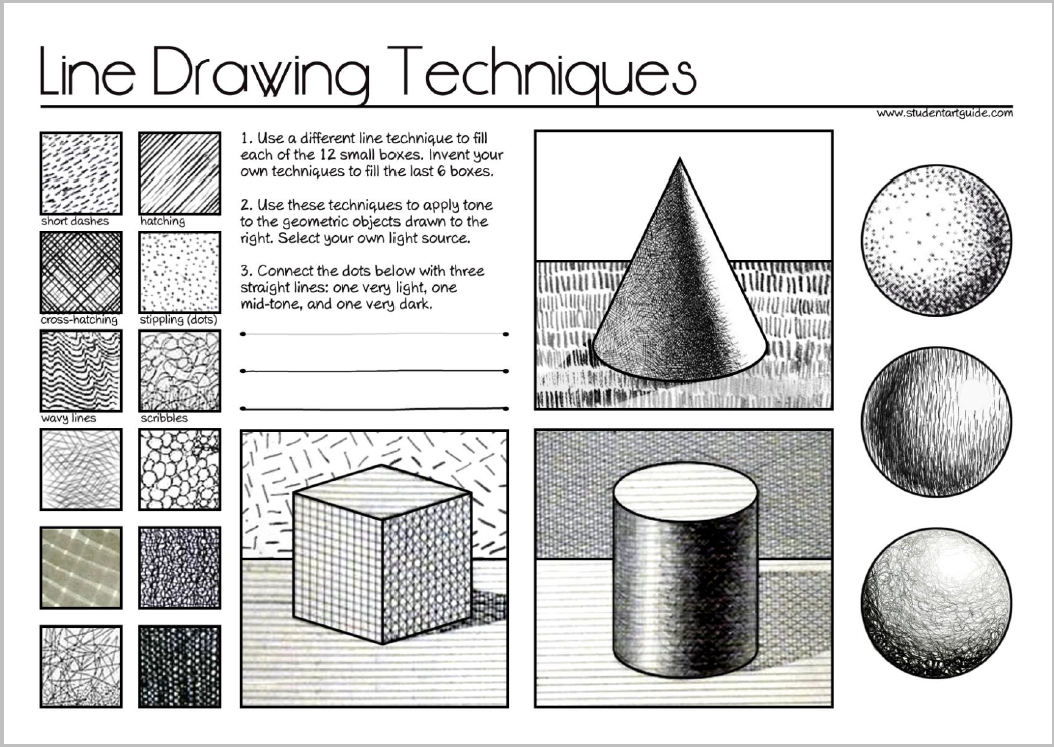
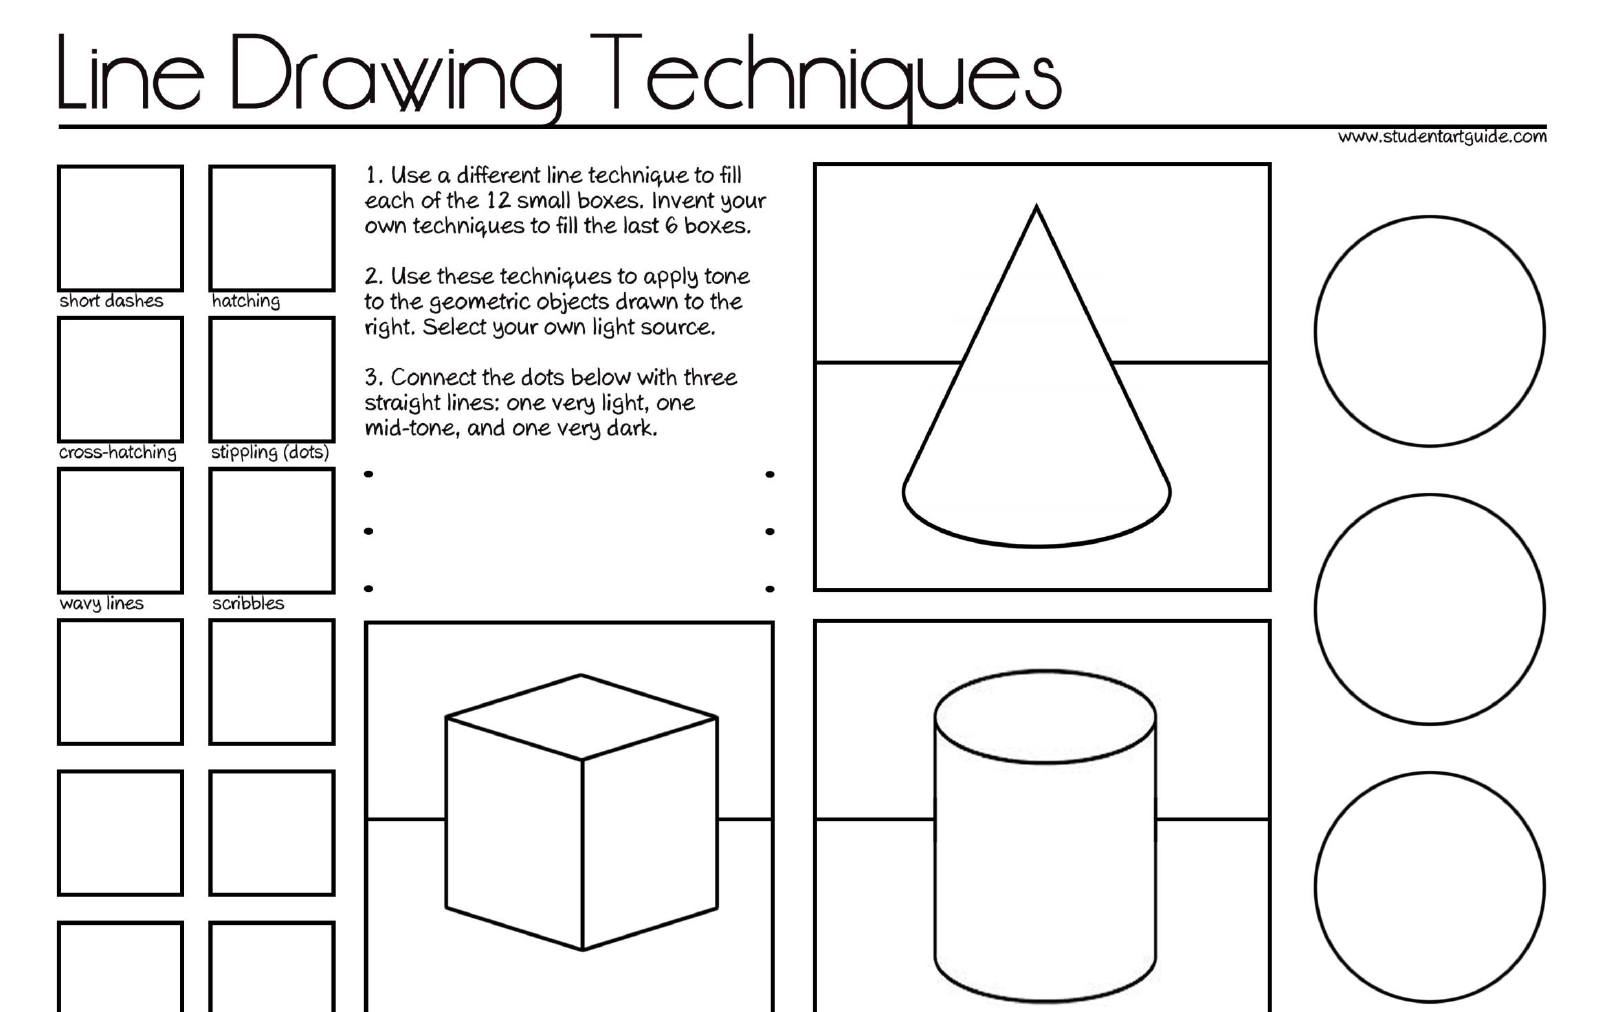
Use the example above to complete the worksheet below.
| line_drawing_techniques.png |
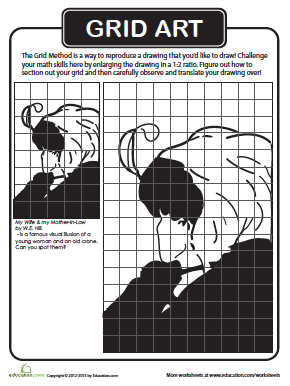
Print out the grid-art-worksheet and redraw the image on the left working carefully to replicate what you see in each box.
| grid-art-worksheet.pdf |
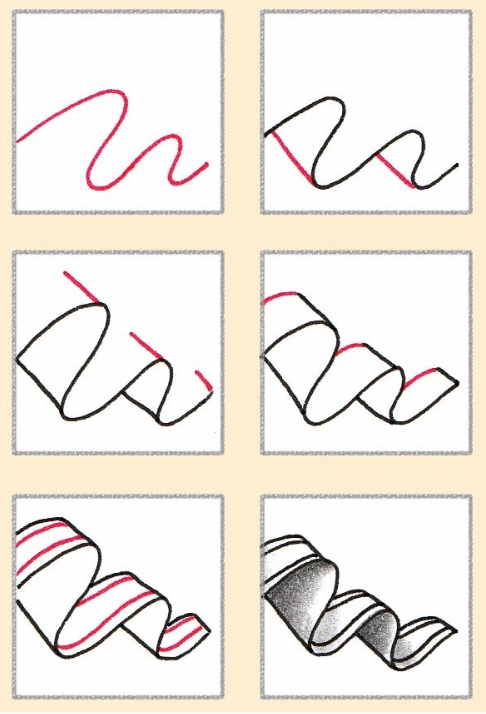
Use LINE and VALUE to create the illusion of a 3D FORM. Example shown below.
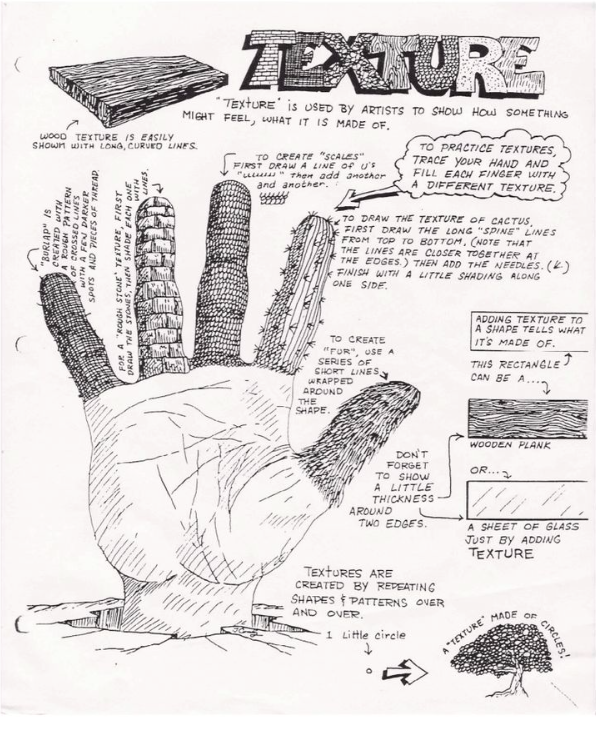
Texture
Complete the texture worksheet below by following the example of the hand. Each finger should have a different example of simulated texture.
| texture.png |
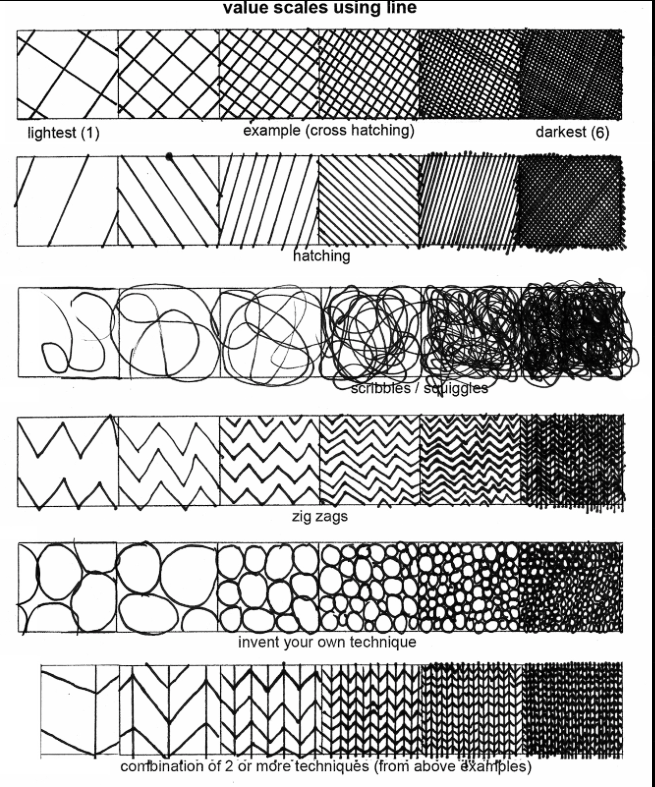
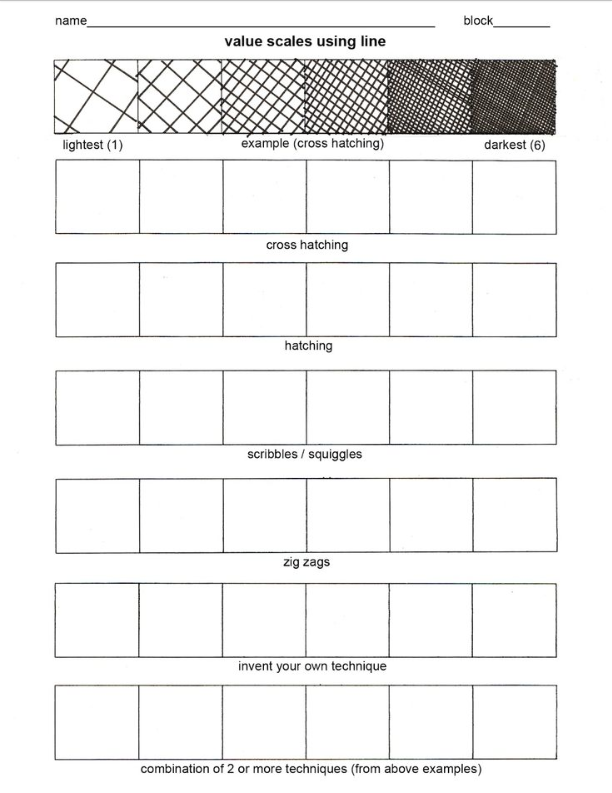
Value
An example of the worksheet below is on the right.
|
| ||||
Color
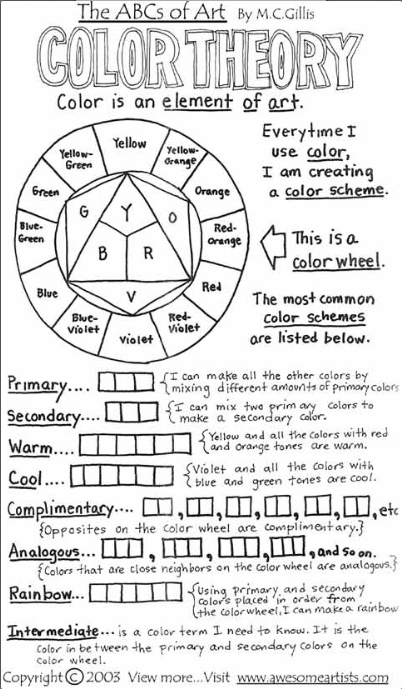
Print out the color worksheet below and color it in using the appropriate colors.
| color.png |
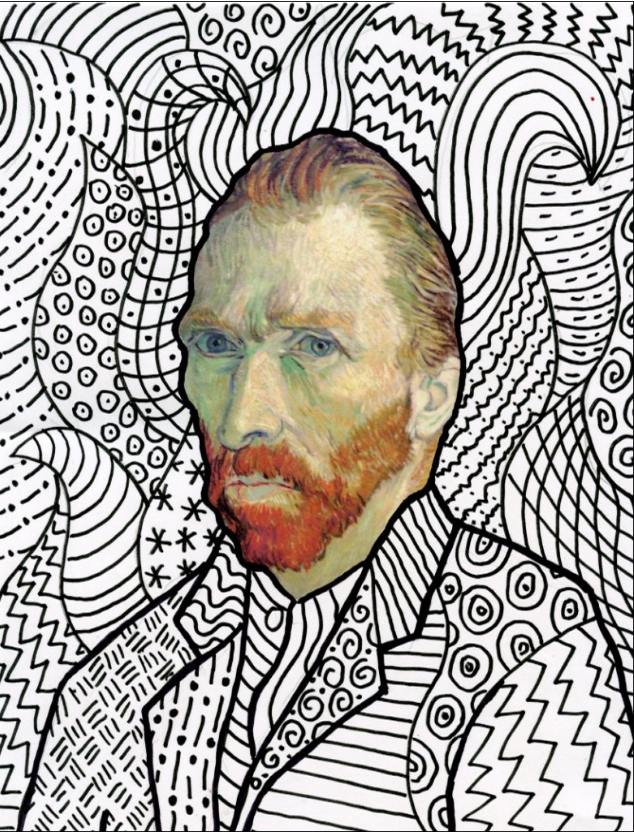
Print out the Vincent van Gogh worksheet below and color each pattern in using a different color scheme. Color schemes you need to use are complimentary, monochromatic, analogous, & triadic. If you don't know what these color schemes are, LOOK THEM UP.
| vincent_van_gogh.png |
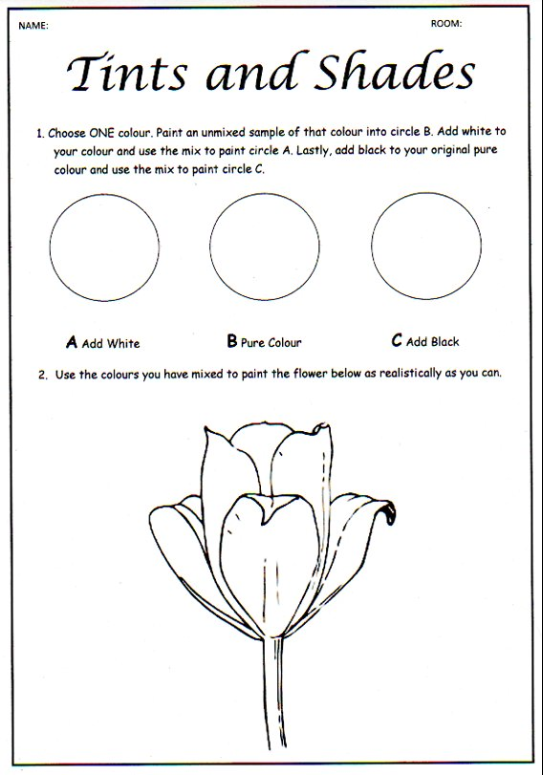
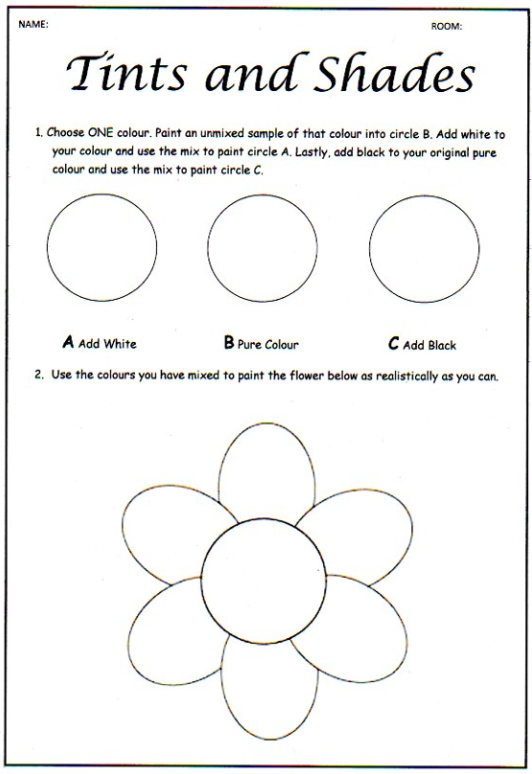
Print out one of the color-mixing worksheets below, either the "tulip" one or the "flower" one. Using paint, put the "pure" (unmixed) color in the center circle. Add white (to tint it) in the left circle and add black (to shade it) in the circle on the right. Then use those three colors to paint the flower realistically. An example is below.

|
| ||||
Perspective
Print the four worksheets below, follow the step-by-step instructions and complete an example of each.
|
| ||||
|
| ||||
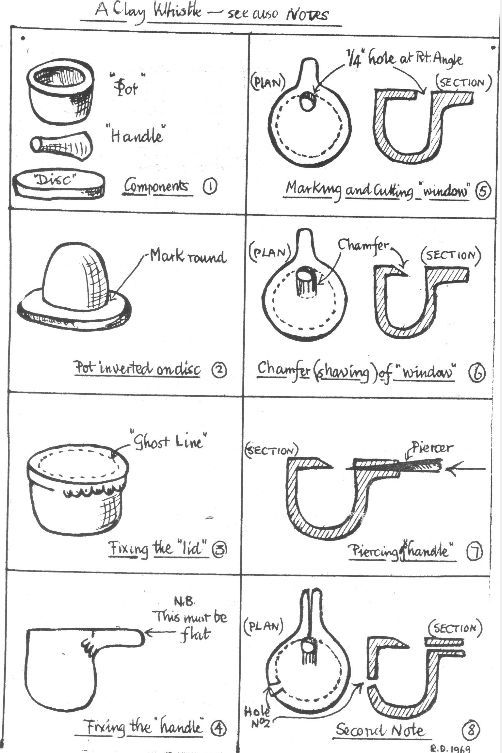
Clay Whistle
1. You will be making a clay whistle when you are able to return to the classroom. While you are out you should be preparing yourself to work with the clay. Begin by going over all of the ceramic vocabulary provided in the link below. Write out all of the words and their definition. Add (at least 5) drawings to help you in remembering what the words are (such as drawing out the tools next to their name).
|
2. Watch the video tutorial below (8 minutes long) about how to make the clay whistle. Add to your notes about how to make the whistle.
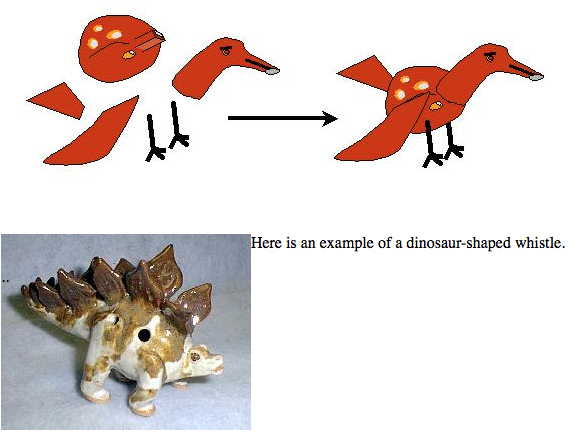
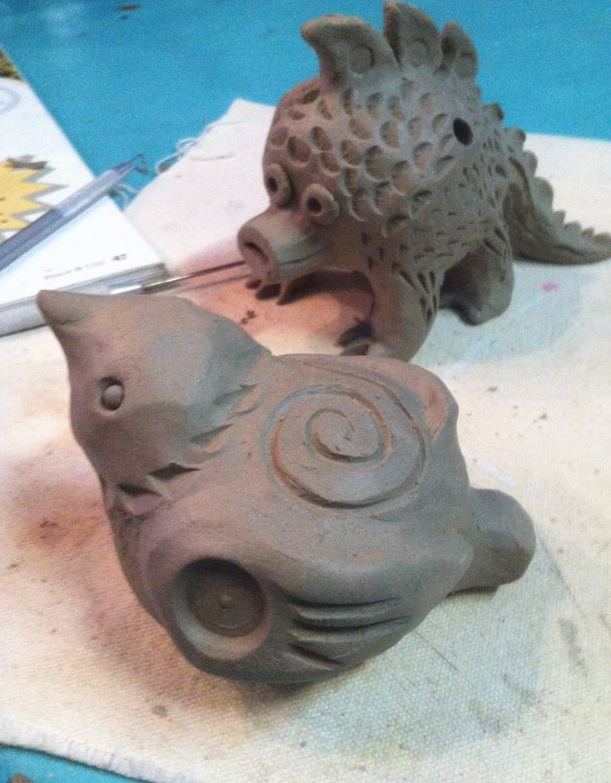
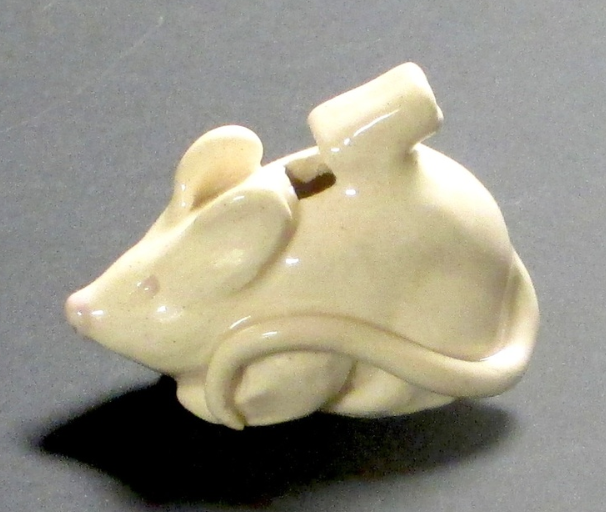
4. Open up the images below to get some ideas about how you can then design your whistle once the structure has been built. Draw out your plan in your notes. If you don't plan to make it creative, then sketch out how the basic whistle form should look.
5. CHECKLIST: Here is what I am expecting from you before you can begin touching clay.
|
|

Clay Research Project
For the research project you will create a PowerPoint demonstrating the beginning of ceramic arts focusing on these cultures; Chinese, Greek, Persian, Mayan & Japanese. There should be 2-3 slides per culture. I want the important facts about each culture's usage of ceramics and pictures to go along with each slide. DO NOT COPY VERBATIM FROM THE INTERNET!
Clay/Raku Reflection
Watch the video and write down at least 5 differences you notice between Raku firing & the normal glazing & firing process IN COMPLETE SENTENCES!
